After you have added all required authorization objects, you have to apply them to the dedicated data models.
To do so, open the authorizations tab in your data model.
You should see all added Authorization Objects in the bottom left box.
To deploy an authorization object to the data model, simply hover over it and click on the emerging add button.
Authorization objects are a handy way to manage access to data within an analysis project.
Authorization objects are typically used to restrict access for users/groups to the data necessary for their field of work. This can be for example regional (by market, country, and continent), division (company code) or client based. Therefore, to use Authorization Objects you must first create them and then assign them to a user and to a data model.
Add Authorization Objects
If the 'Add' button (item 3) is clicked:
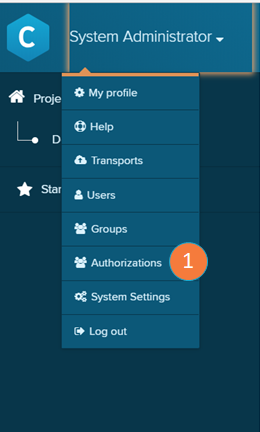
To enable authorizations, you first have to add authorization objects to Celonis 4.
Therefore, navigate to the Homescreen and choose Authorizations (item 1) from the main menu.
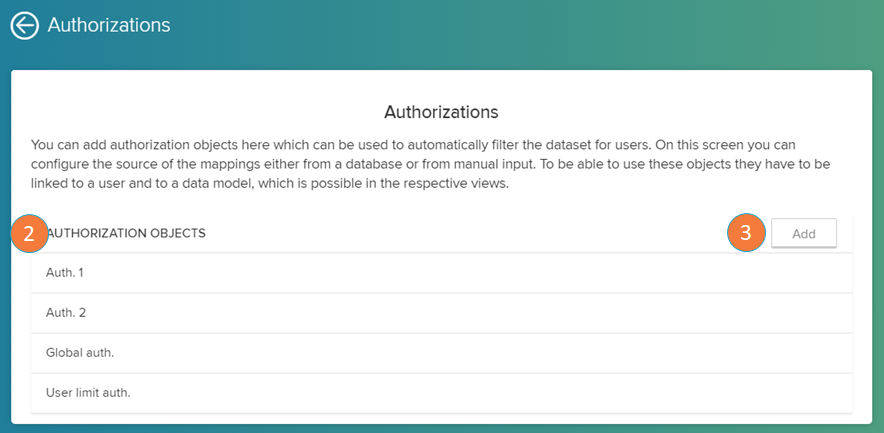
- Authorizations: click here to open the authorizations screen.
- Authorization objects: list of already created authorization objects. Click on them to view their properties.
- Add authorizations: click to create new authorization objects.
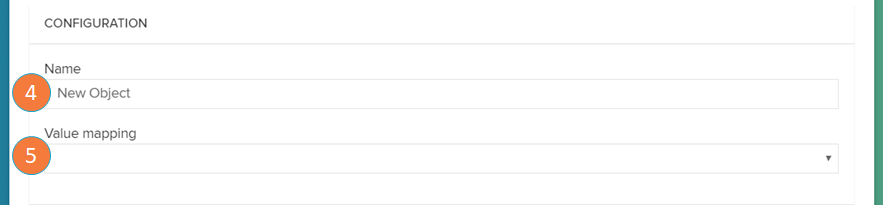
- Name: name of the authorization object.
- Value mapping: here you can decide whether the values for your mapping should be queried from a database or entered manually.
A. Values queried from a database
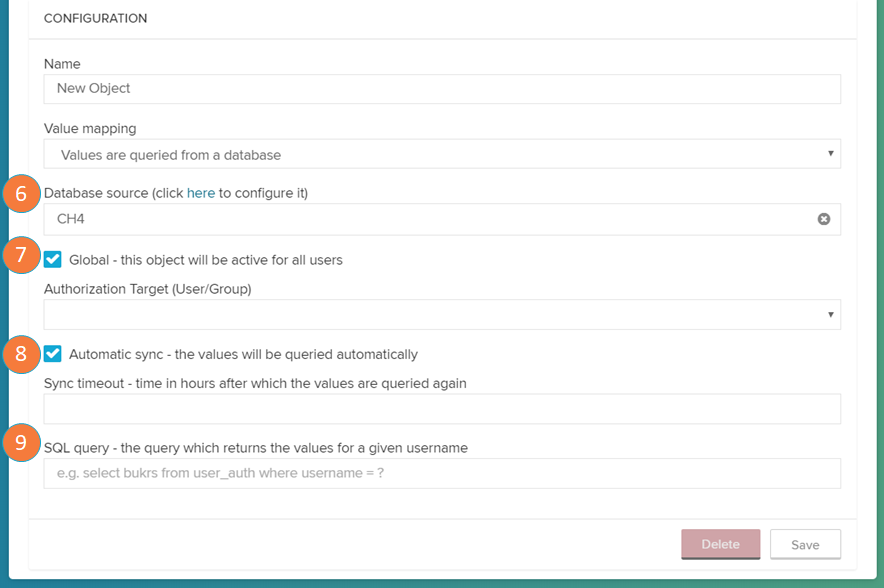
A. Values queried from a database
- Database source: select the database that contain the authorization queries
Global: select this ticker if you want your authorization to be active for all users or groups
Note
If the object is set to GLOBAL the authorization object assignment to the user profiles is not done immediately for all profiles.
Whenever a user is opening an analysis that is restricted by the respectiv authorization, the application will add the autorization object to the user profile (and immediately synchronize the values)Automatic sync: select this ticker if you want your authorization to be automatically queried and define the time interval between syncs. The minimum value in hours is 1.
Note
The synchroniation timeout is checked upon accessing an analysis for each user individually.
- SQL query: define the query that returns values according to a given username
B. Values entered manually
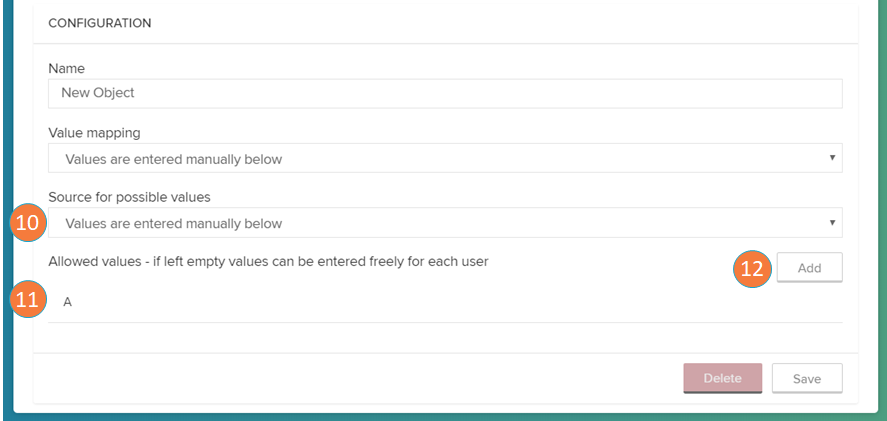
B. Values entered manually
Choose this option if you want to add the allowed values manually. However, please be aware that the values have to be adapted every time they change, as they are not queried from any external data source.
10. Source for possible values: define a source which contains possible values that may be filtered.
11. Allowed values: list of allowed values.
12. Add: add a new allowed value.
Application to data models
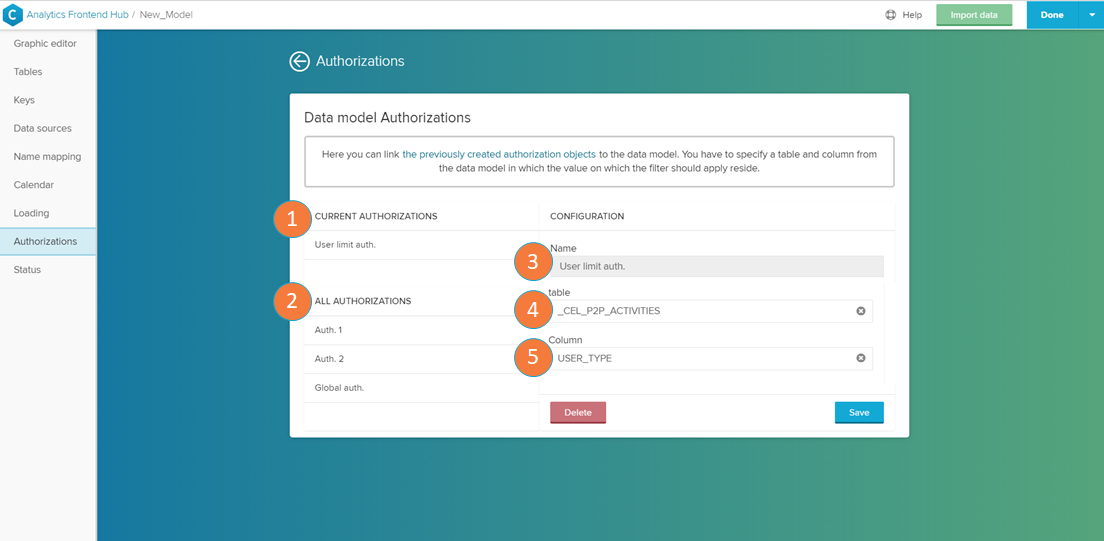
After you have added all required authorization objects, you have to apply them to the dedicated data models.
To do so, open the authorizations tab in your Data Model.
- Current authorizations: authorizations that were already applied in this data model. Click on one to view its properties.
- All authorizations: authorizations that have still not been applied in this data model. To deploy an authorization object to the data model, simply hover over it and click on the emerging add button.
- Name: name of the selected authorization.
- Table: table in which the authorization filter will be applied.
- Column: column of the selected table above in which which the authorization filter will be applied.
Once the authorization is created or edited, confirm your operation with the 'Save' button.
Application to user
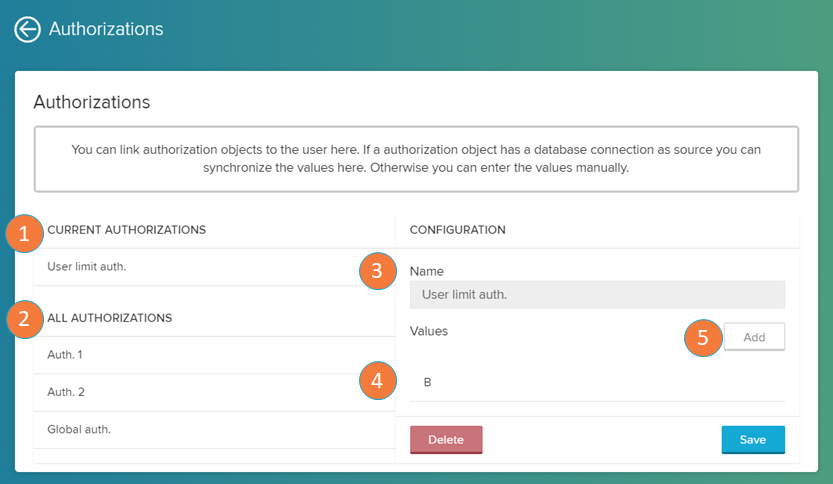
In this step, you have to apply the authorizations to the respective users/groups.
To do so, click on 'Manage authorizations' on the desired User Profile (see item 5 of the 'User Profile' section in the 'User Profile' page).
- Current authorizations: authorizations that were already applied to this user. Click on one to view its properties.
- All authorizations: authorizations that have still not been applied to this user. To deploy an authorization object to the data model, simply hover over it and click on the emerging add button.
- Name: name of the selected authorization.
- Values: list of values which the user is allowed to see.
- Add: add new values to this authorization.
Once the authorization is created or edited, confirm your operation with the 'Save' button. After this is done, the user can only view the part of the data you have authorized him/her to see.