The Data importing process aims at creating a new data model or to add new tables to your current data model.
New data model
After a name is selected (see item 2)
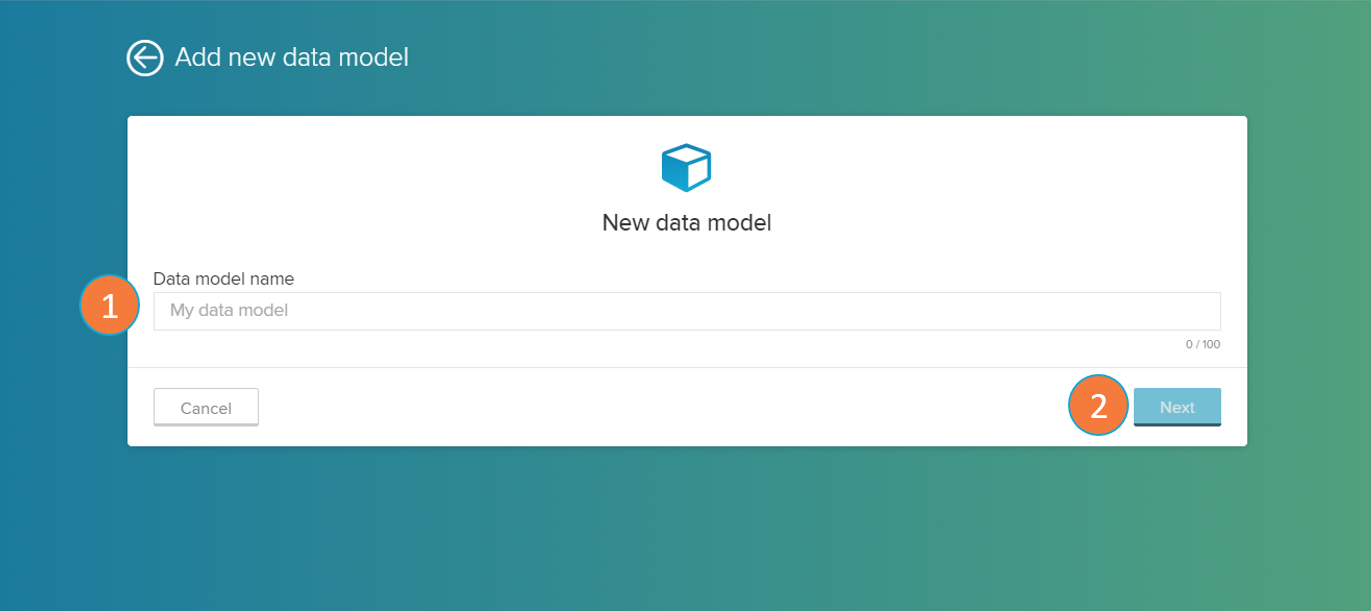
To add a new data model, click on the "Add new data model" button on the Data Models screen (item 4). This will lead you to the data model creation wizard.
- Data model name: type here the name of your new data model.
- Click on the next button to continue.
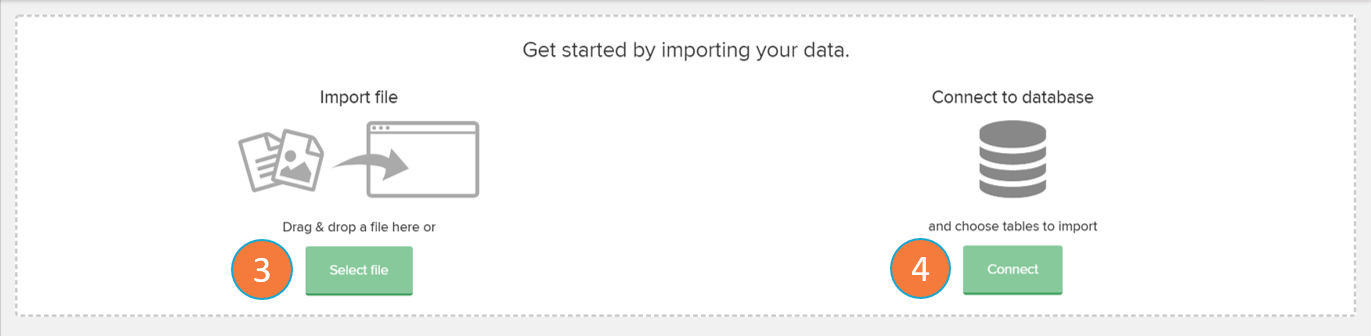
After that, you must select the source from which the data will be imported (file or database).
3. Import file: you can import your data from a file (.xlsx, .csv and .xes are supported). For this option, go to the 'File connection' section.
4. Connect to database: you can import your data from a live database. For this option, go to the 'Database connection' section.
File connection
Step 1: File parsing
Step 2: Data types
To import the data from a file, first select a valid file (.xlsx, .csv and .xes are supported) for upload. Once the upload is successful, the Celonis engine will proceed on parsing the file into the desired column format (step 1) and then assigning a data type to each of these columns (step 2).
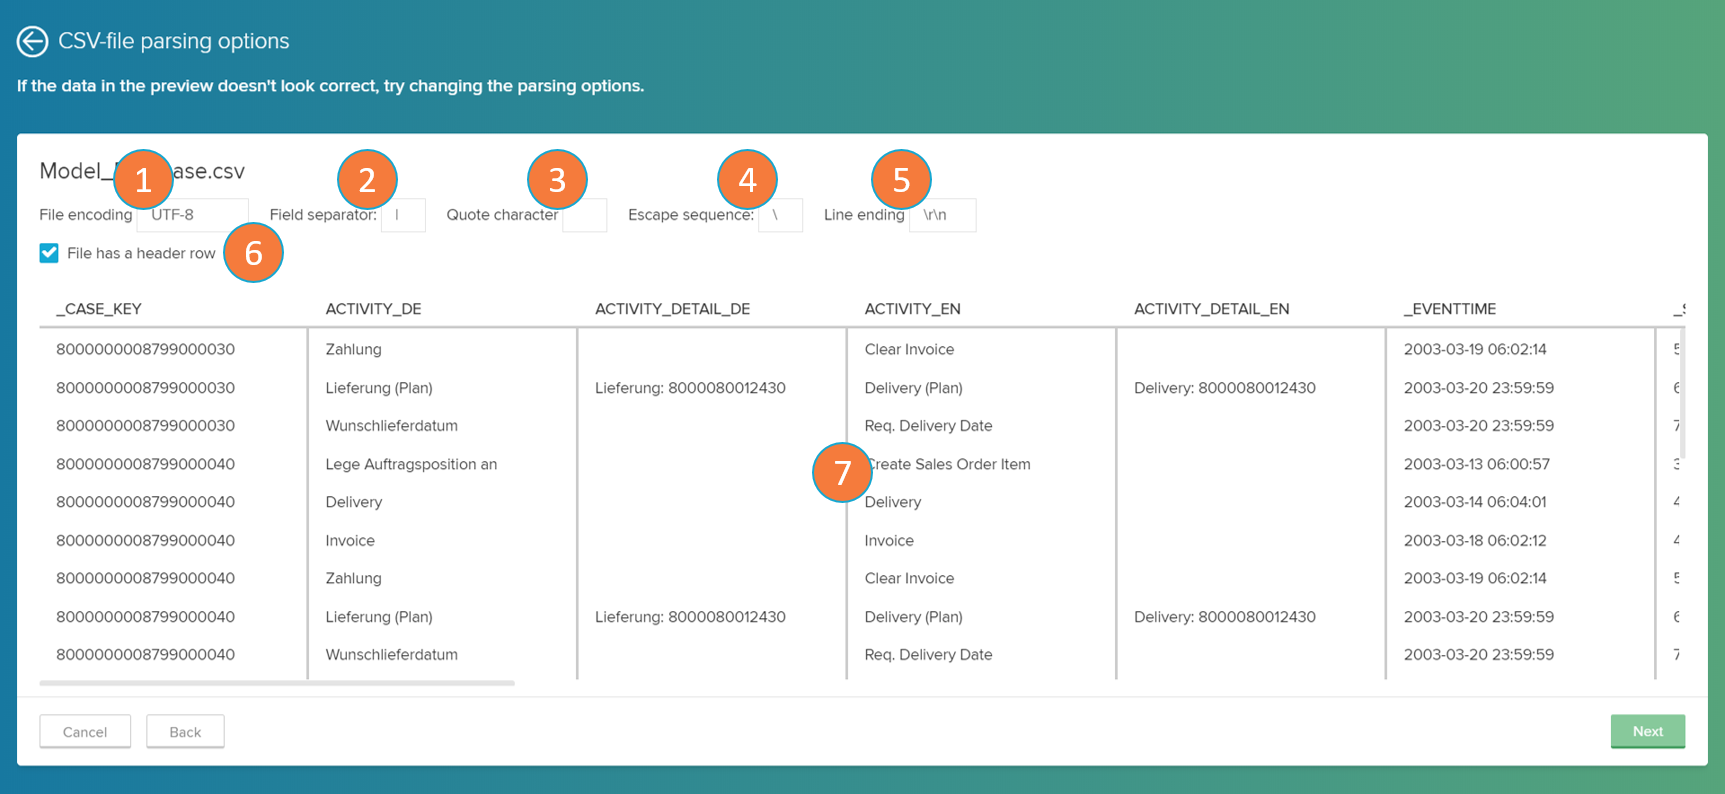
Step 1: File Parsing
- File encoding: define the character encoding in the file. Default: UTF-8.
- Field separator: character used to delimit different columns in the data file. Common values are quotes ( " ), commas ( , ), semi-colons ( ; ), or vertical bars ( | ).
- Quote character: define, if necessary, the character used as a quote inside the data file. Quotes may be in the varied formats, such as the straight single quote ( ' ), the straight double quote ( " ), the opening single quote ( ‘ ), the closing single quote ( ’ ), the opening double quote ( “ ), and the closing double quote ( ” ).
- Escape sequence: defines the escape character, if necessary. Escape characters invoke an alternative interpretation on subsequent characters in a character sequence.
- Line ending: character or sequence of characters that mark the ending of a line or row.
- Header row: defines if the first row should be considered a header row or not.
- Imported columns: displays the columns imported and parsed from your database file.
Step 2: Data types
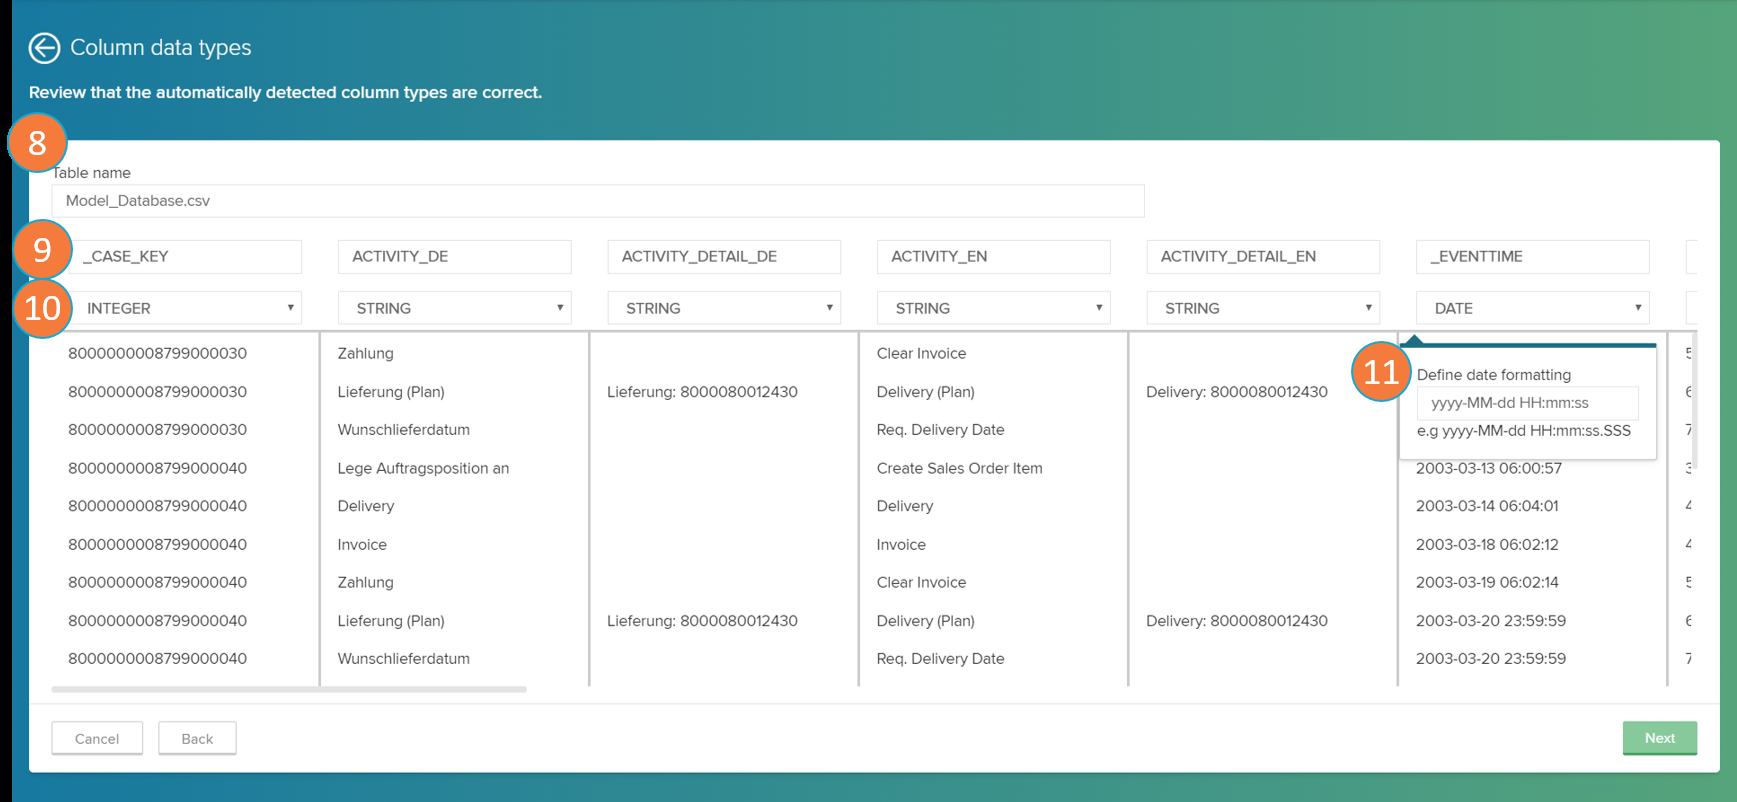
In the following step, the column's data types are detected. This is done automatically and can be customized afterwards with the dropdown on each column.
8. Table name: assign a name to your table.
9. Column name: define the name of each column in the data table.
10. Data type: define the name of each column in the data table.
11. Date formatting: for 'DATE' data types, you may also define the date format style.
To proceed, head to the 'Configure data model' section below.
Database connection
Step 1: Database connection
Database connection settings (if items 2 or 4 are clicked)
Step 2: Select tables to import
Step 3: Select activity table
To import the data from a database, first connect to a valid database (step 1). Once the connection is successful, the Celonis engine will prompt you to select the tables to import (step 2) and then assign a data type to each of these columns (step 3).
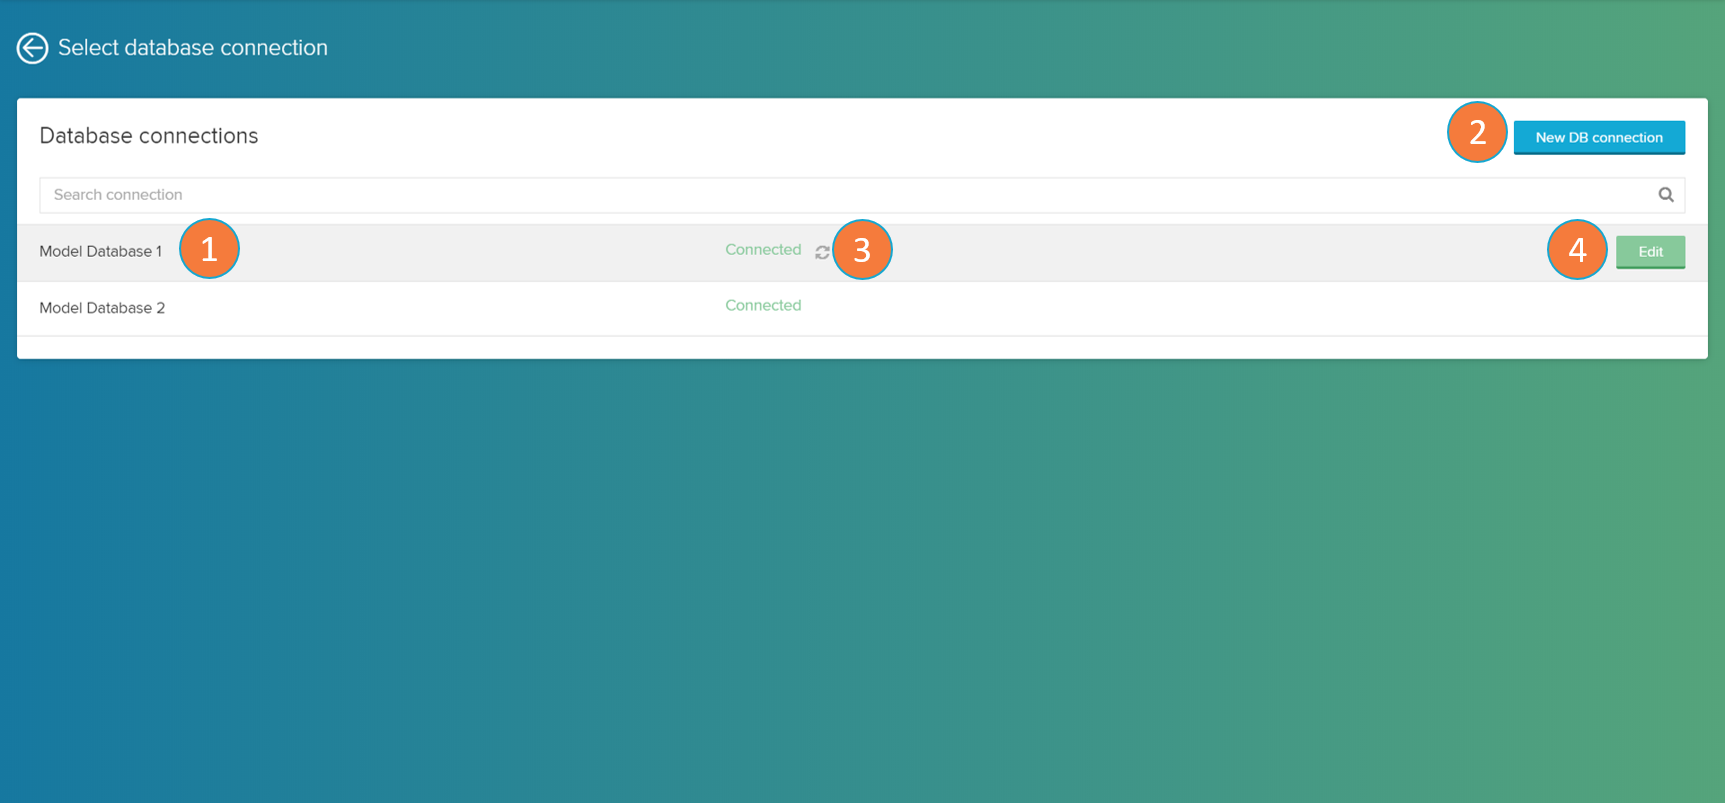
Step 1: Database connection
- Database name: name of the database. Click on the row to select the database.
- New DB connection: connects to a new database. Opens the database connection settings panel to configure a new connection (see 'Database connection settings' below).
- Connection status: displays if the connection status to the database was successful ('connected') or not ('connection problem'). To retry the connection, click on the refresh
 button.
 - Edit database: hover your mouse over a certain database to view its edit buttons. Opens the database connection settings panel for the selected database (see 'Database connection settings' below).
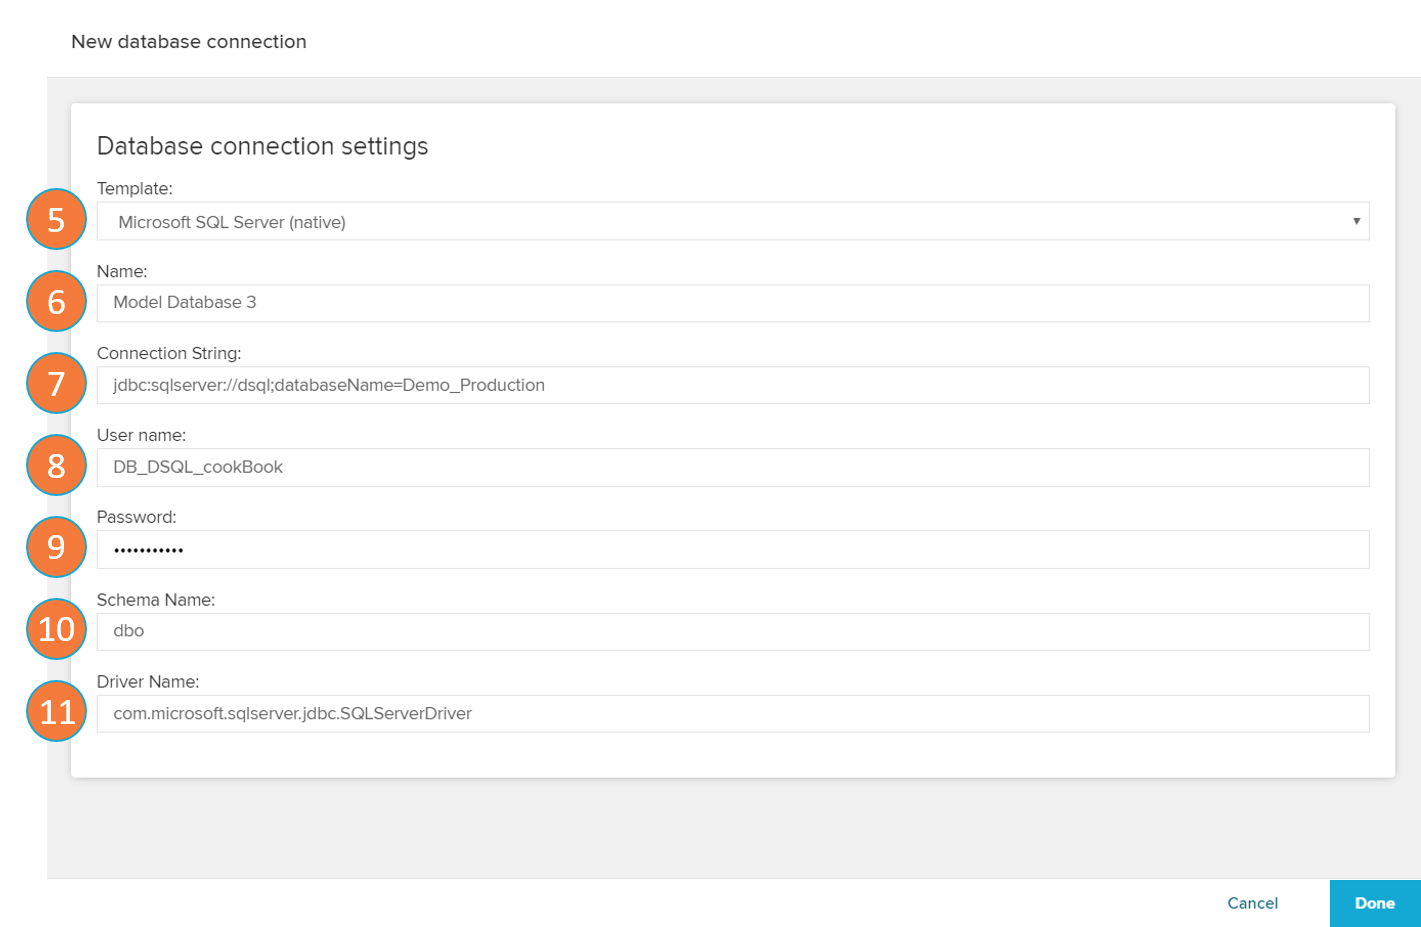
Database connection settings
5. Template: if you use a common database (e.g. Microsoft SQL Server, Postgre SQL, Oracle or SAP HANA), choose the respective entry from the dropdown list. This will insert a Connection String with wildcards, as well as the common Driver Name for this database.
6. Name: enter a name for your data source. This name will also appear in the list of existing data sources.
7. Connection string: link to your source database. By choosing a connection template, this will be filled out automatically, and you only need to adapt the wildcards.
8. User name: your database access user name.
9. Password: your database access password.
10. Schema name: schemas name a subset of tables and other dictionary objects within a database.
11. Driver name: provide the driver implementation name for the engine to fulfill your communication requests. If you choose a connection template, this is filled out automatically. Usually, you don't need to add anything here within a connection template.
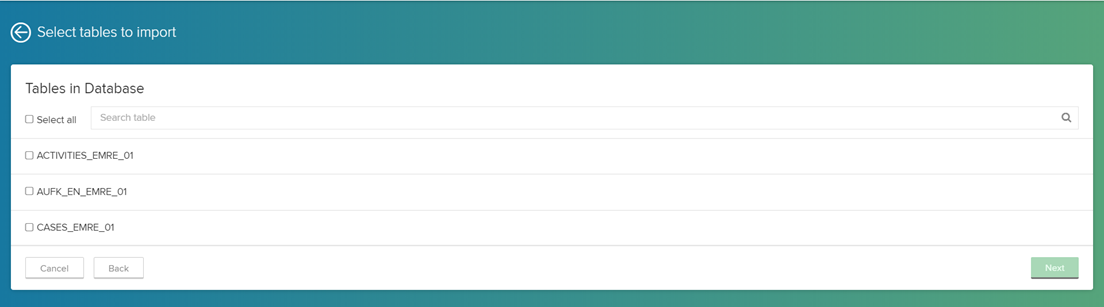
Step 2: Select tables to import
Use the provided checkboxes to select the tables that you wish to import.
You must select at least one table (if it is a new data model, this should be the activity table). For a sufficient analysis document, you will most likely require at least two tables, a case table and an activity table (read more about tables here).
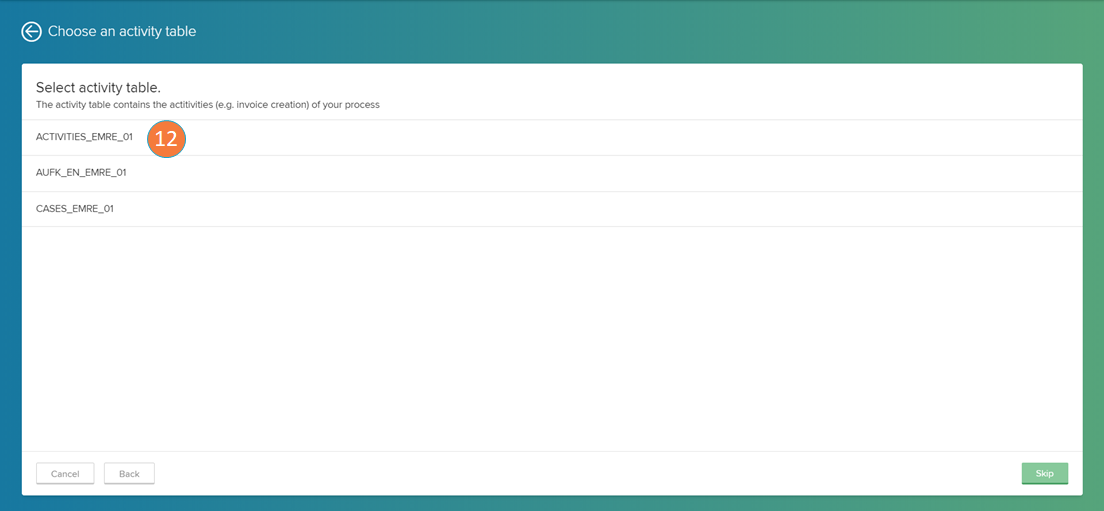
Step 3: Select the activity table
The activity table (item 12) includes all activities, and is required by any component in the analysis document.
To proceed, head to the 'Configure data model' section below.
Configure data model
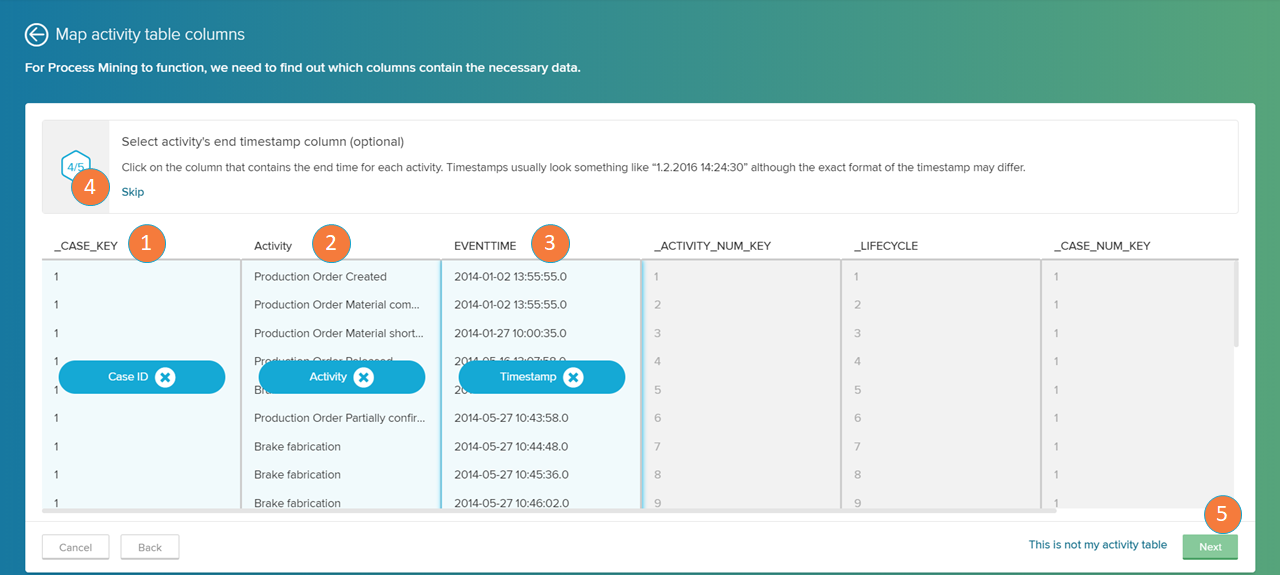
To finalize the creation of a data model, you must to provide the three mandatory eventlog configuration tables (Case ID, Activity, and Time stamp) and two optional additional tables (End time stamp, Sorting).
- Case ID: On the first step, click on the column that contains the Case IDs.
- Activity: On the second step, click on the column that contains the description of the activities.
- Time stamp: On the third step, click on the column that contains the time in which the activities took place.
- Optional activities: on the forth step, click on the column with the time in which the activities ended. If such column doesn't exist, click on the 'Skip' link. The same applies for the fifth step, in which the sorting column may be chosen.
- Click on Next to finalize the selection.
After the database model is created, you can create a new Celonis Analyses automatically associated to this database or do it later on by Creating an analysis.